

How to Take a Screenshot on a iPad :: Welcome to our comprehensive guide on how to take a screenshot on an iPad. In this article, we will provide you with detailed instructions and tips to capture screenshots effortlessly on your iPad. Whether you’re a novice or a seasoned iPad user, we’ve got you covered. Let’s dive in!
Understanding the Basics
Before we delve into the various methods of capturing screenshots on your iPad, let’s understand some essential concepts:

What is a Screenshot?
A screenshot is a digital image that captures the contents displayed on your iPad’s screen at a specific moment. It allows you to preserve and share information, conversations, memorable moments, or any other visual content you encounter on your device.
Why Would You Need to Take a Screenshot?
There are numerous reasons why you might want to take a screenshot on your iPad. Here are a few common scenarios:
1. Capturing Important Information: You might want to save an online receipt, an article, or any other valuable information for future reference.
2. Troubleshooting: If you’re facing technical issues or encountering errors on your iPad, taking a screenshot can help you communicate the problem effectively with support personnel.
3. Sharing with Others: Screenshots are an excellent way to share funny conversations, memorable social media posts, or any visual content you come across with your friends, family, or colleagues.
Now that we understand the significance of screenshots, let’s explore the different methods available for capturing them on your iPad.
Method 1: Using the Physical Buttons
The simplest and most widely used method to take a screenshot on an iPad involves using the physical buttons. Here’s how you can do it:
1. Locate the Power button: On most iPad models, you can find the Power button on the top-right corner or the right side of the device.
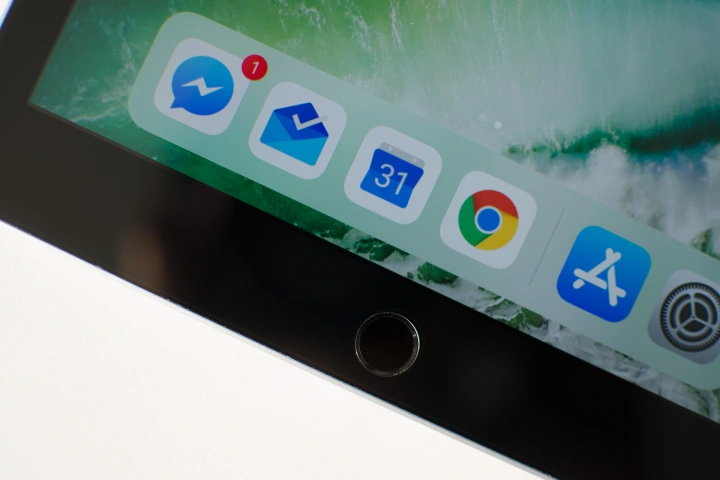
2. Locate the Home button: For older iPad models with a physical Home button, you can find it at the bottom of the screen. However, if you have a newer iPad model without a Home button, skip this step.
3. Capture the Screenshot: Press and hold the Power button and the Home button simultaneously for a brief moment. If you have a newer iPad model without a Home button, press and hold the Power button and the Volume Up button instead.
4. Confirmation and Access: Once you release the buttons, your iPad’s screen will flash, and you’ll hear a camera shutter sound (if the sound is enabled). The screenshot will be saved in your Photos app under the “Screenshots” album, where you can access and manage it later.
Method 2: Utilizing AssistiveTouch
If you find using the physical buttons inconvenient or you have a newer iPad model without a Home button, you can take advantage of AssistiveTouch. AssistiveTouch is an accessibility feature that provides virtual buttons to perform various actions on your iPad. To take a screenshot using AssistiveTouch, follow these steps:
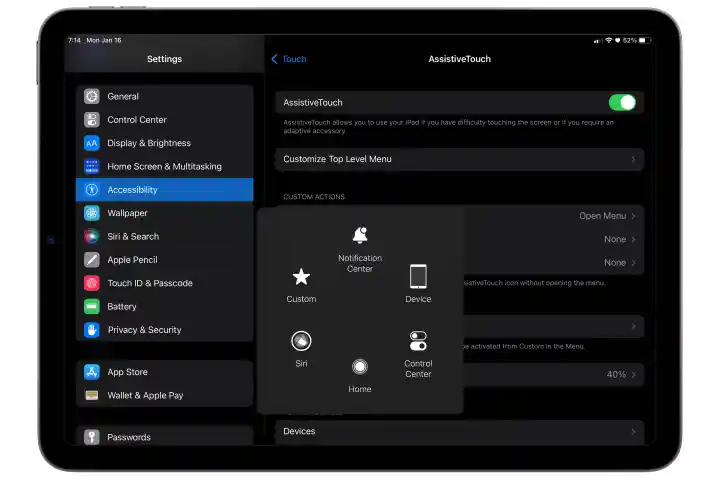
1. Enable AssistiveTouch: Go to your iPad’s settings, tap “Accessibility,” then select “Touch.” Inside the “Physical and Motor” section, choose “AssistiveTouch” and toggle the switch to enable it.
2. Customize Top Level Menu: Once AssistiveTouch is enabled, you can customize the actions performed by the virtual button. Tap “Customize Top Level Menu” and add the “Screenshot” action to the list.
3. Capture the Screenshot: Tap the AssistiveTouch floating button on your screen. From the menu that appears, select “Screenshot.” Your iPad will capture the screenshot instantly.
4. Accessing the Screenshot: After taking the screenshot, it will be saved in your Photos app, just like with the physical button method.
Method 3: Utilizing Control Center
If you prefer a more streamlined approach, you can also take a screenshot using the Control Center on your iPad. Here’s how to do it:
1. Open Control Center: Depending on your iPad model, swipe down from the top-right corner (iPad with Face ID) or swipe up from the bottom of the screen (iPad with Home button) to access the Control Center.
2. Locate the Screenshot Button: In the Control Center, you’ll find a button that resembles a square with a smaller circle inside. This is the Screenshot button.
3. Capture the Screenshot: Tap the Screenshot button, and your iPad will capture the screenshot immediately.
4. Finding the Screenshot: As with the previous methods, your iPad will save the screenshot in the Photos app for you to access and manage later.
Read More : How to Take a Screenshot on a Laptop: A Comprehensive Guide for Windows and Mac OS
Conclusion
Congratulations! You’ve now learned multiple methods to capture screenshots on your iPad. Whether you prefer using the physical buttons, AssistiveTouch, or the Control Center, taking screenshots has never been easier.
Remember to make the most of this useful feature for preserving important information, troubleshooting, or sharing exciting content with others. So, grab your iPad and start capturing those memorable moments, saving crucial information, and sharing captivating content with others. Happy screenshotting!
Note: This article is a comprehensive guide on taking screenshots on an iPad. While screenshots are a valuable feature, remember to respect the privacy and rights of others when sharing or using screenshots. Always use this feature responsibly and ethically.


