

Where do Screenshots Go on Mac :: Welcome to our comprehensive guide on finding screenshots on a Mac! If you’re a Mac user, you’ve probably taken screenshots at some point to capture important information or share something visually with others.
However, locating those screenshots afterward can sometimes be a bit challenging. In this article, we will walk you through the various methods of finding screenshots on your Mac, ensuring that you can quickly and effortlessly access your captured images whenever you need them.
Method 1: The Default Location
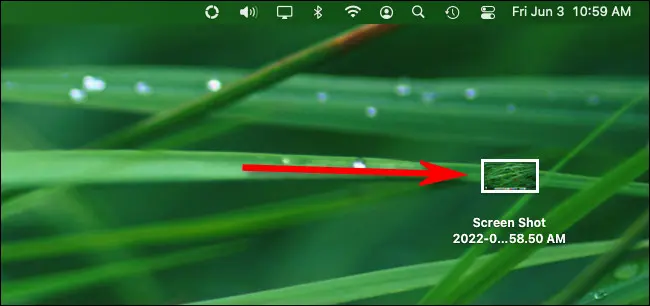
By default, your Mac saves screenshots to the desktop. Whenever you capture a screenshot using the built-in tools, it will be automatically saved as a PNG file on your desktop. To locate your screenshots, simply follow these steps:
1. Minimize or close any open windows and applications.
2. Look for the desktop icon on your Dock, typically located at the bottom of your screen.
3. Click on the desktop icon to reveal the contents of your desktop.
4. Look for the screenshot files, which will have names beginning with “Screen Shot” followed by the date and time of capture.
5. Once you’ve located your desired screenshot, you can double-click on it to open and view the image.
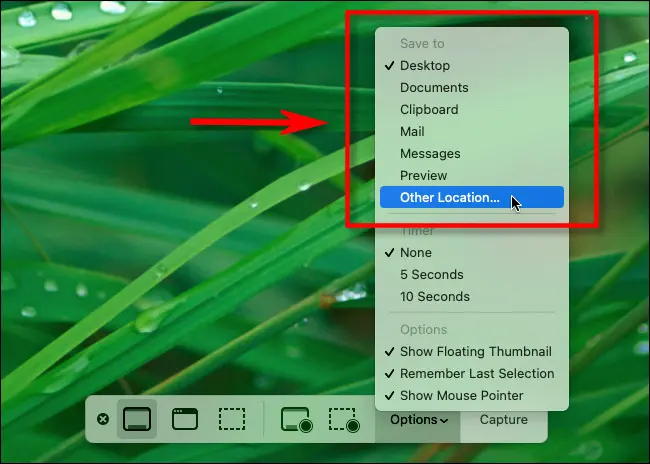
Remember, if you have a cluttered desktop or manually changed the default save location, your screenshots may not be in this location. In that case, let’s explore an alternative method.
Method 2: The Screenshots Folder
To make it easier for users to manage their screenshots, Mac provides a dedicated folder for storing these images. Here’s how you can access it:
1. Open a new Finder window by clicking on the Finder icon located on your Dock (it resembles a blue face).
2. In the menu bar at the top of the screen, click on “Go.”
3. From the drop-down menu, select “Go to Folder.”
4. In the text field that appears, type or paste the following: `~/Library/Containers/com.apple.screencapture/Data/Library/Preferences/`
5. Press Enter or click on “Go.”
6. A new Finder window will open, and you should see a folder named “Desktop.”
7. Open the “Desktop” folder, and you’ll find all your screenshots sorted by date and time.
Method 3: Terminal Commands
For advanced users comfortable with using Terminal commands, there’s an alternative method to find your screenshots. Here’s what you need to do:
1. Open the Terminal application on your Mac. You can find it in the Utilities folder within your Applications folder or by using Spotlight search (press Command + Space and type “Terminal”).
2. Once the Terminal window is open, type the following command and press Enter: `defaults write com.apple.screencapture location`
3. You can specify the desired location by appending the path to the command above. For example, if you want to save your screenshots to a folder called “Screenshots” on your desktop, the command would be: `defaults write com.apple.screencapture location ~/Desktop/Screenshots/`
4. After entering the command, press Enter. You won’t see any visual confirmation, but the change will take effect.
5. From now on, any new screenshots you capture will be saved in the specified location.
Method 4: Third-Party Apps
If you prefer using third-party applications to manage your screenshots, several options are available on the Mac App Store. These apps often provide additional features and customization options. Here are a few popular choices:
1. Snagit: A powerful and versatile screenshot tool that allows you to capture, edit, and share screenshots with ease.
2. Lightshot: A lightweight and user-friendly app that enables you to capture screenshots, annotate them, and save or share them effortlessly.
3. Skitch: An app by Evernote that combines screenshot capture, annotation, and sharing in a simple and intuitive interface.
Read More : Screenshot Apple Mac: Capture Your Screen with Ease
Conclusion
With the information provided in this comprehensive guide, you should now have no trouble locating your screenshots on a Mac. Whether you prefer using the default desktop location, the dedicated screenshots folder, Terminal commands, or third-party applications, you can easily access your captured images and use them as needed.
Remember, quickly finding your screenshots enhances your productivity and allows you to effectively communicate and share information with others. So, go ahead, capture those moments, and effortlessly retrieve them whenever you need them!


