

How to Take a Screenshot on a Laptop :: In today’s digital age, capturing screen shots has become an essential skill for various purposes, whether it’s for illustrating a point, troubleshooting technical issues, or simply preserving memorable moments.
In this comprehensive guide, we will walk you through the process of taking a screen shot on different devices and operating systems, equipping you with the necessary knowledge to capture your screen effortlessly. Get ready to unlock the power of screen capture!
1. Understanding Screen Shots
Before diving into the specifics of capturing screen shots, let’s clarify what a screen shot is. A screen shot, also known as a screen capture or screengrab, is a digital image that represents the contents of a computer, tablet, or mobile device screen at a given moment. It allows you to freeze-frame any visual element displayed on your screen, providing you with a static image that can be saved, edited, and shared.
Screen shots are widely used in various scenarios, such as creating tutorials, troubleshooting technical issues, reporting bugs, demonstrating software features, or archiving web content. Now, let’s explore the different methods for taking screen shots on various platforms.
Taking a Screen Shot on Windows
Windows operating systems offer several built-in methods to capture screen shots. We’ll discuss three popular approaches: using the Print Screen key, utilizing the Snipping Tool, and leveraging the Windows Game Bar.
Using the Print Screen Key
The Print Screen key, often abbreviated as “PrtScn,” is a simple yet powerful way to capture your entire screen or a specific window. Follow these steps:
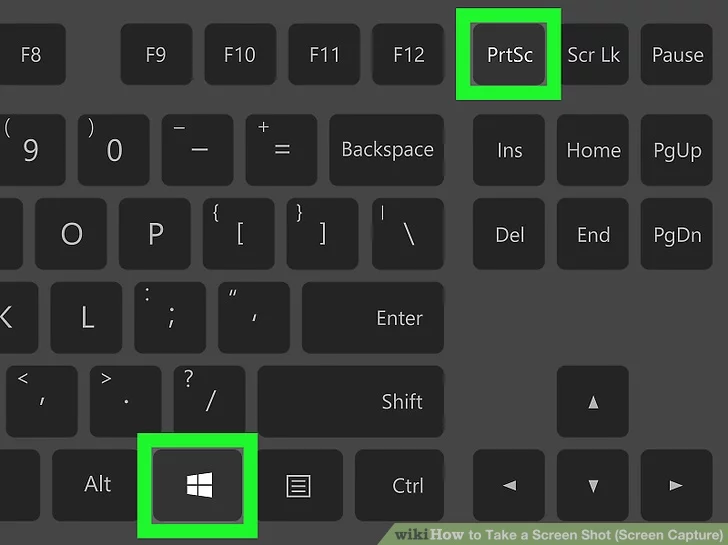
1. Make sure the screen you want to capture is visible.
2. Locate the Print Screen key on your keyboard, usually found in the top-right area.
3. Press the Print Screen key. This will copy the entire screen to your clipboard.
To capture only the active window instead of the entire screen, press the “Alt” key together with the Print Screen key. This technique is useful when you don’t want to include the surrounding desktop or other open applications.
Using the Snipping Tool
Windows also provides the Snipping Tool, a versatile built-in application that allows you to capture a selected portion of your screen. Here’s how you can use it:
1. Open the Snipping Tool by clicking on the Start menu, typing “Snipping Tool” in the search bar, and selecting the application from the results.
2. Once the Snipping Tool is open, click on the “New” button to initiate the screen capture process.
3. Position the cursor at one corner of the area you want to capture, then click and drag to select the desired region.
4. Release the mouse button to finalize the selection and open the Snipping Tool editor, where you can annotate, save, or share your screen shot.
Using the Windows Game Bar
If you’re using Windows 10, you have the option to utilize the Windows Game Bar to capture screen shots and even record gameplay. Follow these steps to use this feature:
1. Press the “Windows” key and the “G” key simultaneously to open the Windows Game Bar overlay.
2. Click on the camera icon or press the “Win + Alt + PrtScn” keyboard shortcut.
3. The screen shot will be automatically saved to your “Videos/Captures” folder.
The Windows Game Bar is primarily designed for gamers, but its screen capture functionality can be useful for various purposes beyond gaming.
Capturing a Screen Shot on Mac
Mac users have several methods at their disposal for capturing screen shots. Let’s explore two popular techniques: utilizing the Grab application and leveraging keyboard shortcuts.
Utilizing the Grab Application
The Grab application, available on Mac computers, offers a user-friendly interface for capturing screen shots. Here’s how to use it:
1. Open the Grab application. You can find it in the “Utilities” folder within the “Applications” directory.
2. In the Grab menu, select the type of screen shot you want to capture: “Selection,” “Window,” “Screen,” or “Timed Screen.”
3. Follow the on-screen instructions to capture the desired screen shot.
4. The captured screen shot will open in a new window, allowing you to save it to a location of your choice.
Using Keyboard Shortcuts
Mac provides convenient keyboard shortcuts to capture screen shots without the need for additional applications. Here are the most commonly used shortcuts:
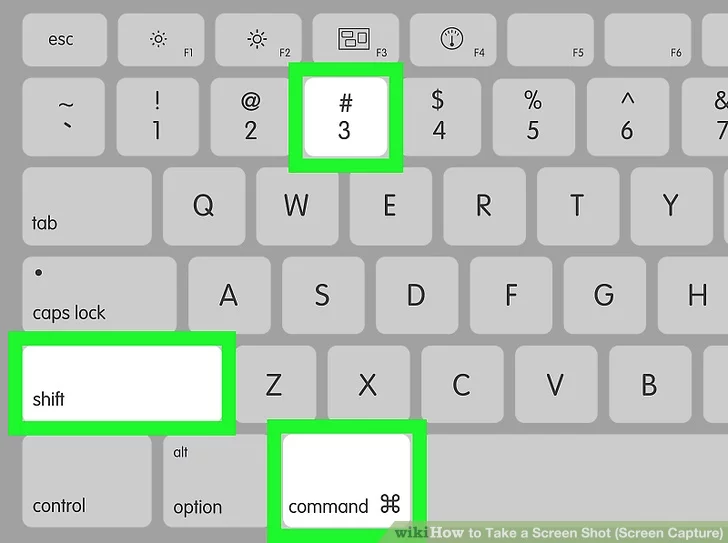
– Capture the entire screen: Press “Command + Shift + 3.” The screen shot will be saved to your desktop.
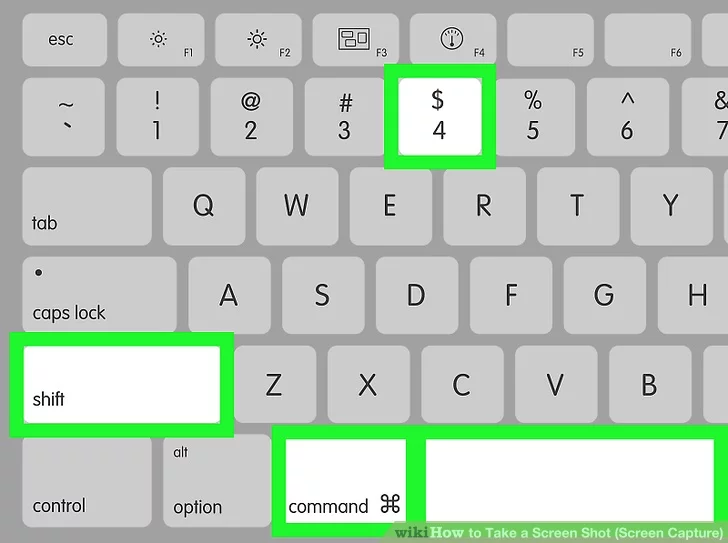
– Capture a specific area: Press “Command + Shift + 4.” The cursor will turn into a crosshair. Click and drag to select the desired region. The screen shot will be saved to your desktop.

– Capture a specific window: Press “Command + Shift + 4” followed by the spacebar. The cursor will turn into a camera icon. Click on the desired window to capture it. The screen shot will be saved to your desktop.
Additional Tips and Tricks
Editing and Annotating Screen Shots
After capturing a screen shot, you may want to edit or annotate it to highlight specific areas or add informative elements. Here are some popular tools for accomplishing this:
- Windows: Utilize built-in applications like Paint or third-party tools like Microsoft Snip & Sketch or Adobe Photoshop.
- Mac: Use the built-in Preview application or third-party tools like Skitch or Adobe Photoshop.
- Mobile Devices: Explore apps like Markup, Skitch, or Adobe Photoshop Express, available for both Android and iOS devices.
These applications offer features such as adding text, arrows, shapes, blurring sensitive information, or adjusting colors to enhance the visual impact of your screen shots.
Organizing and Sharing Screen Shots
As you accumulate a collection of screen shots, it’s essential to have an organized system in place. Consider implementing the following practices:
1. Create Folders: Organize your screen shots into categorized folders for easy access and retrieval.
2. Rename Files: Give your screen shots descriptive names that reflect their content to facilitate quick identification.
3. Cloud Storage: Utilize cloud storage services like Google Drive, Dropbox, or iCloud to store and access your screen shots across multiple devices.
4. Sharing Options: Leverage platforms like email, messaging apps, social media, or file-sharing services to share your screen shots with others conveniently.
Remember to consider privacy and security concerns when sharing sensitive or confidential information through screen shots.
Read More : How to Screenshot Windows: A Complete Guide
Conclusion
Congratulations! You have now become well-versed in the art of screen capture. We’ve explored various methods to take screen shots on different operating systems, from Windows and Mac. Armed with this knowledge, you can effortlessly capture and save important moments, troubleshoot technical issues, or create engaging tutorials. Remember to practice and experiment with different techniques to find the method that suits your needs best. Happy screen capturing!


